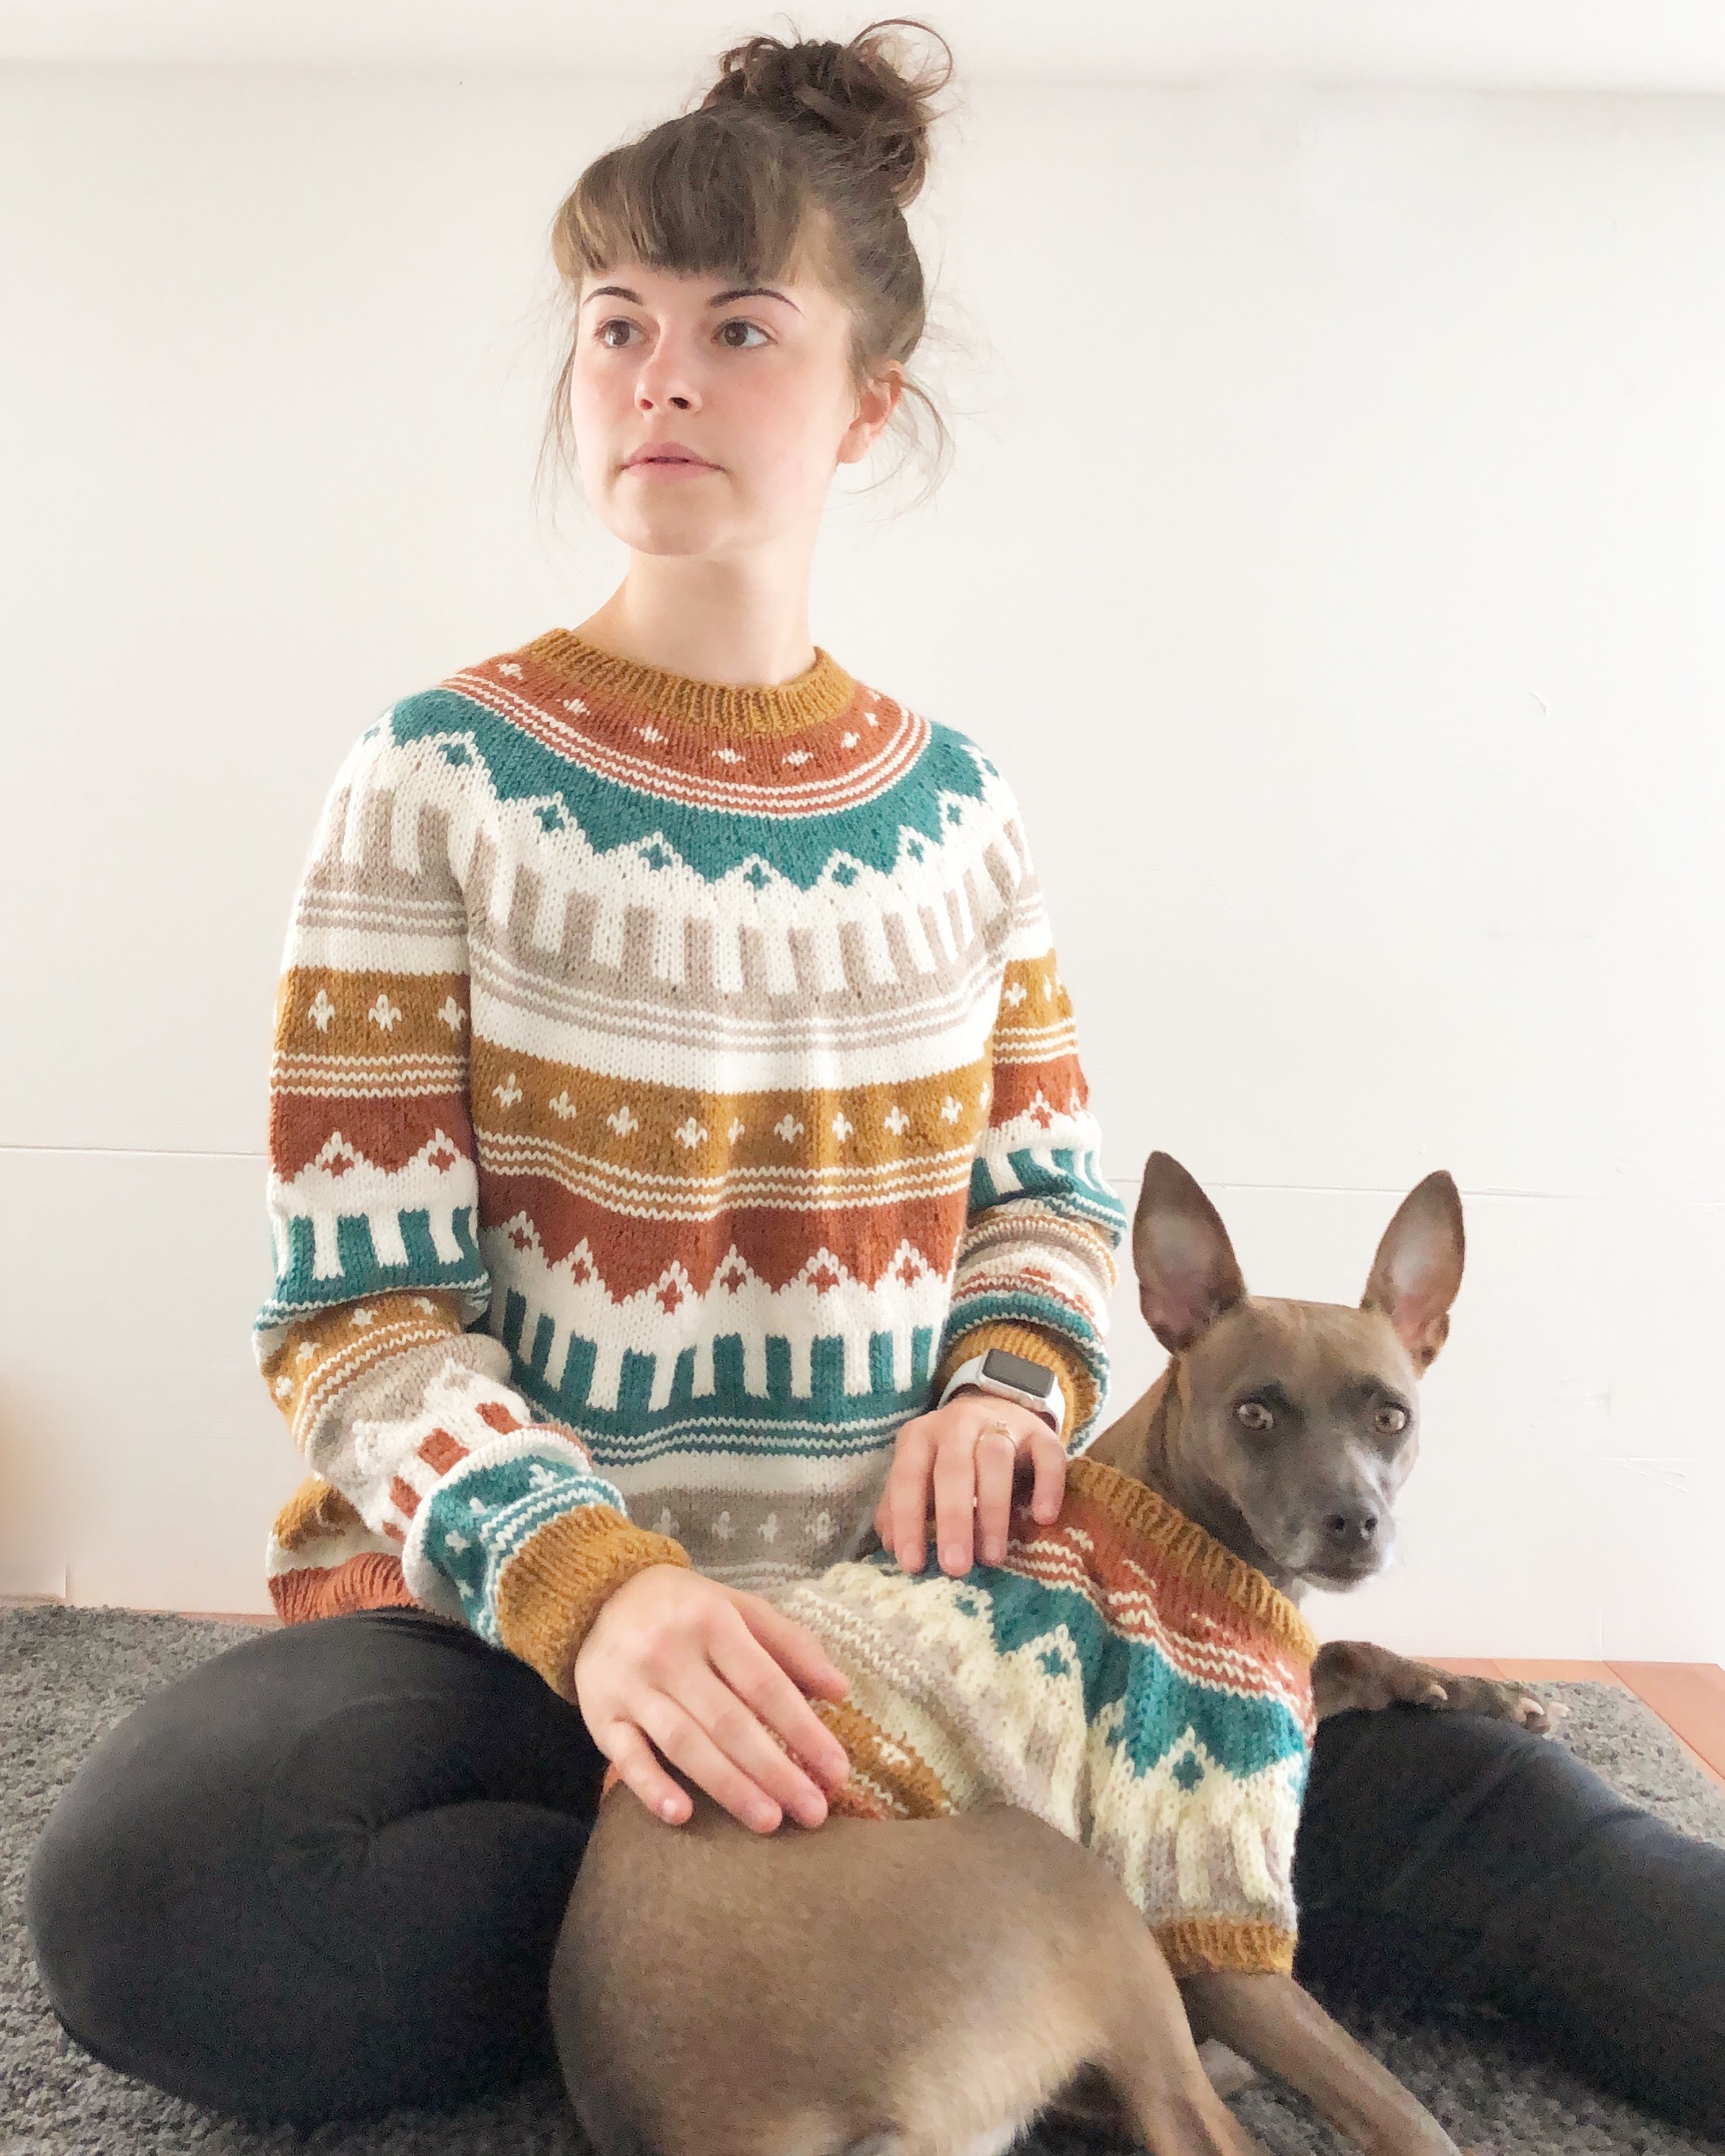


Diy Clay Stitch Marker Tutorial
Making your own stitch markers has never been so easy!

Materials:
Oven Bake Clay (Sculpy is my favorite, easy to find in most craft stores!)
Xacto Knife
Jump Rings (if you use big knitting needles, buy larger jump rings so they will fit on your needle! make sure to pick up some small ones too)
Bake Tray (make sure to clean thoroughly after use)
Wax paper and tape
Roller (you can use the handle of your xacto knife, or a pen)
Tooth pick OR small 1/16” drill bit (They’re $2 at any hardware store, and are soooo much better for making a clean hole!)
Circle cutter (looks like a small cookie cutter)
Needle nose pliers (They’re really cheap at a craft store and are really handy!)
Circle Stitch markers:
Tape your wax paper to a flat surface.
2. Roll your clay out nice and flat using a roller or a pen, make sure it’s not too thin or it’ll break during use.

3. Cut out your stitch marker circles using your circle cutter, or make a small ball of clay and flatten it out into a circle.
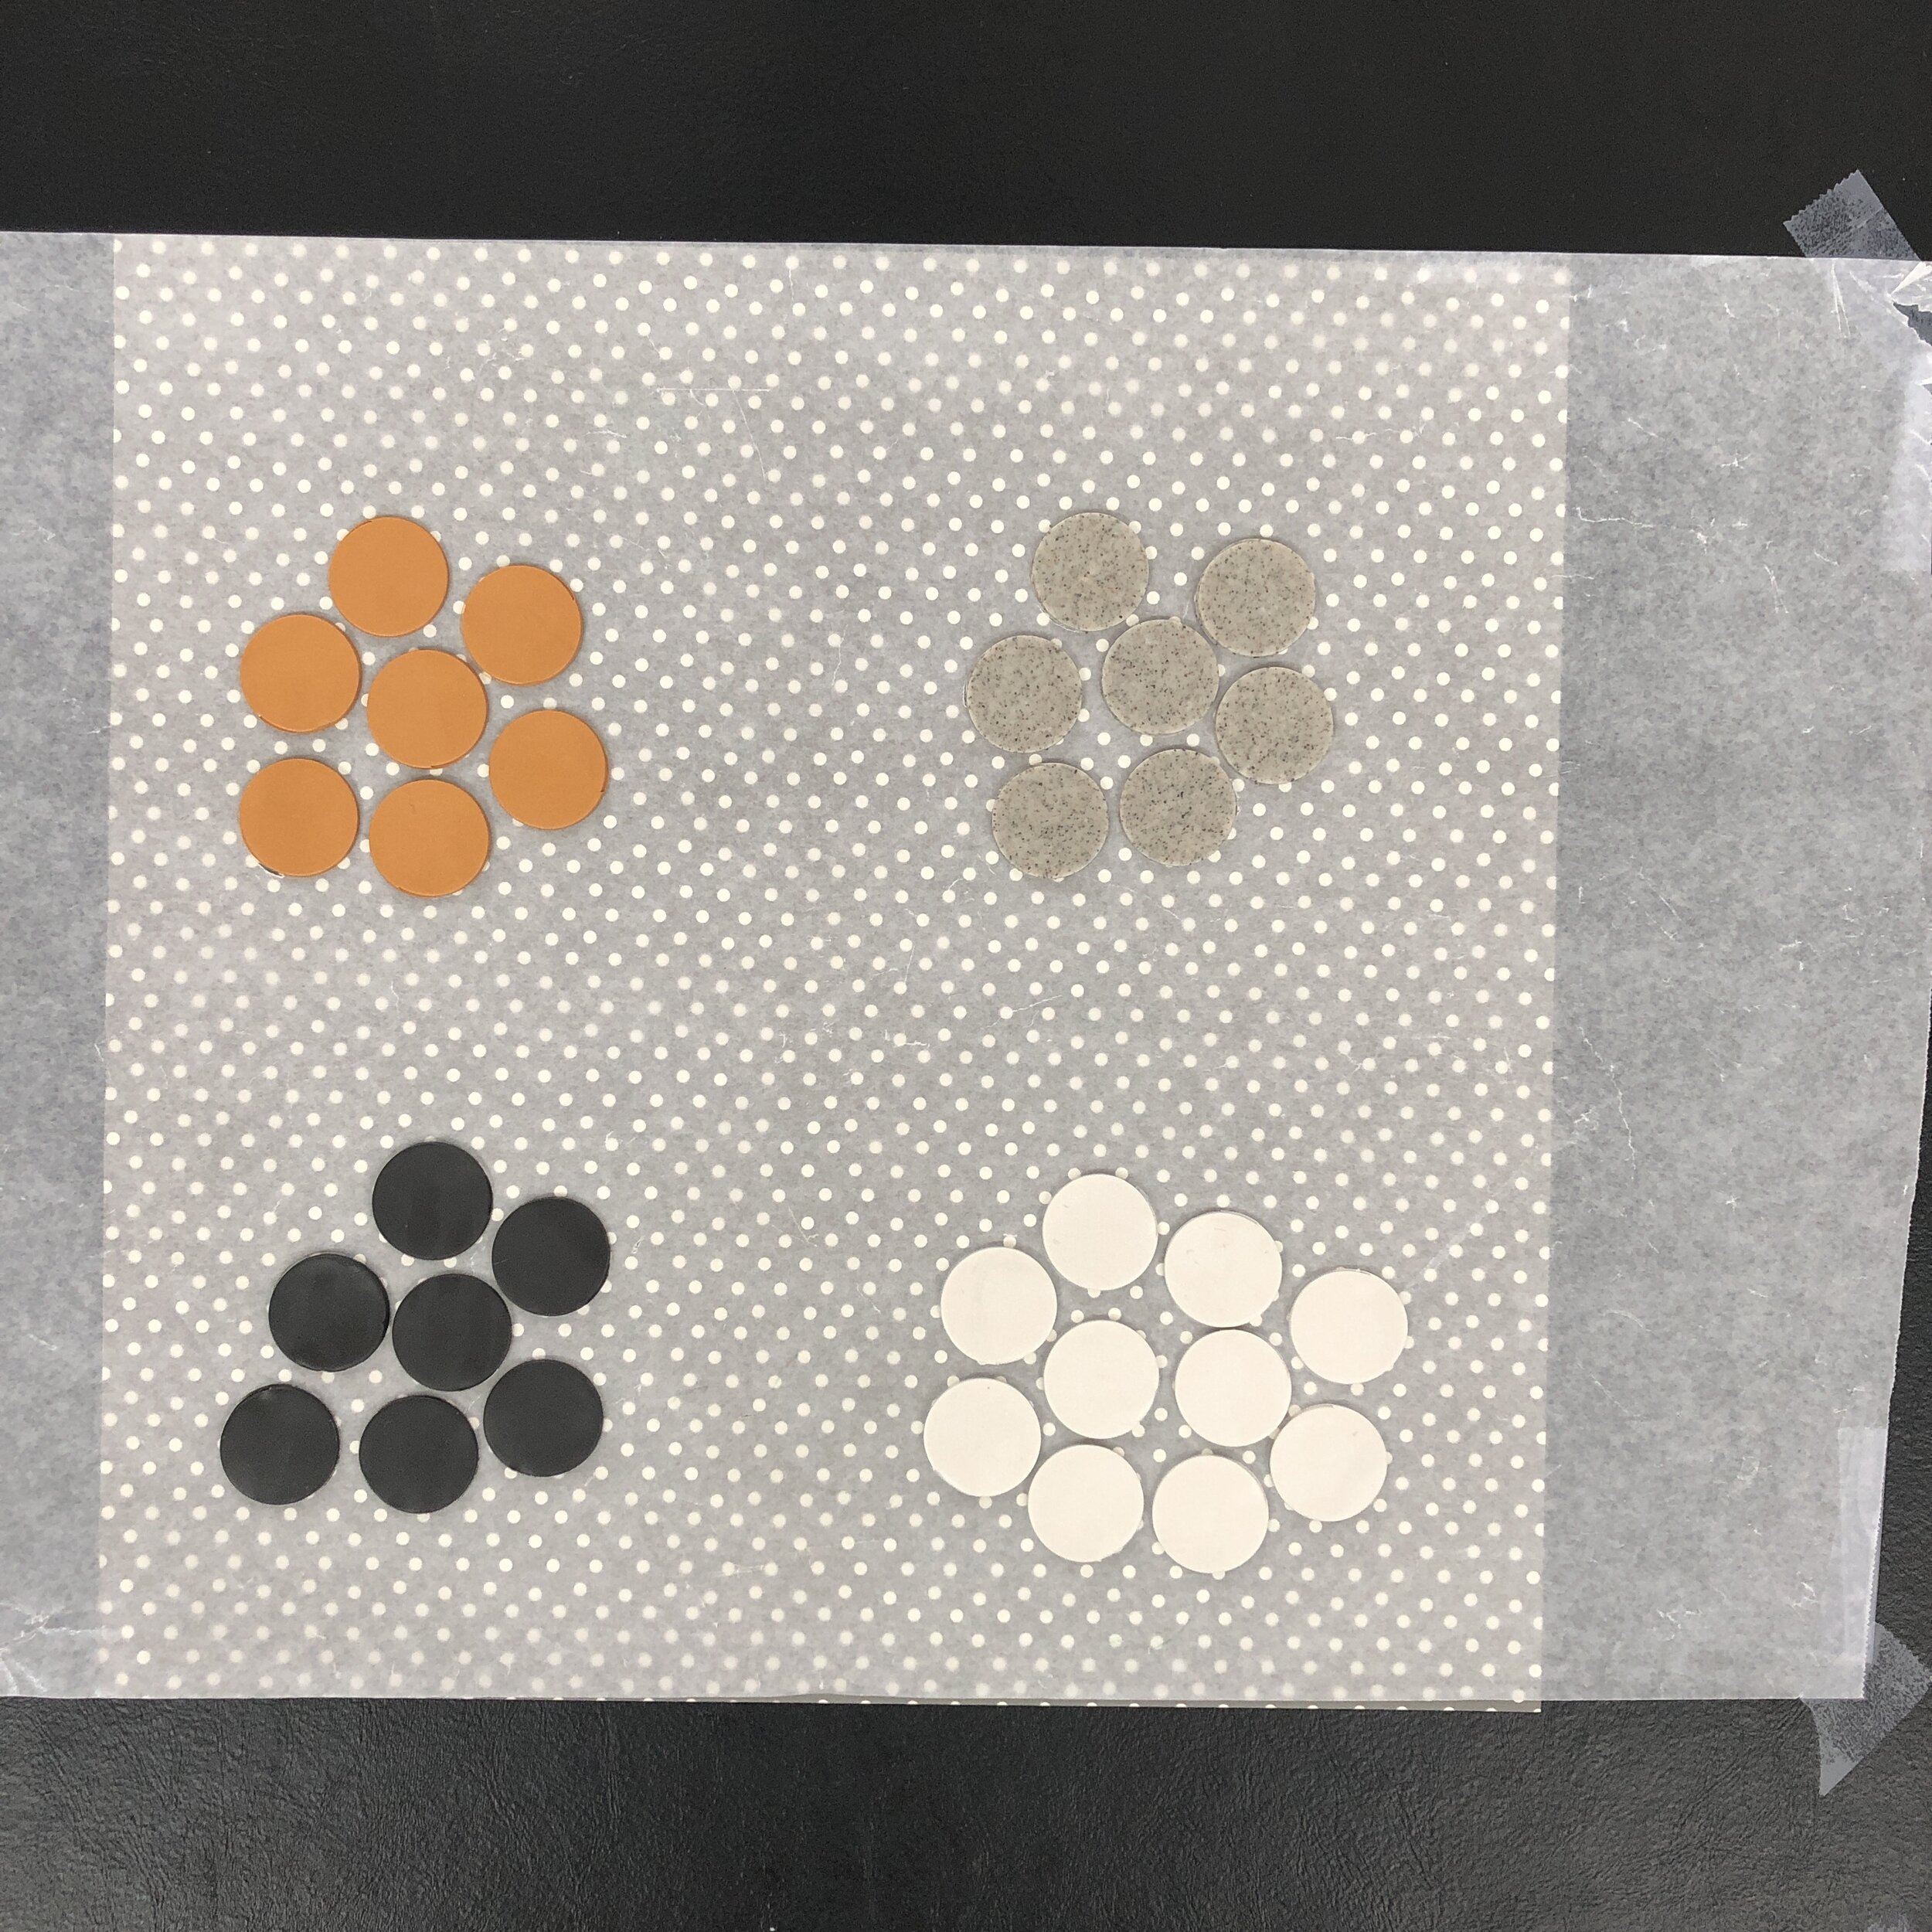
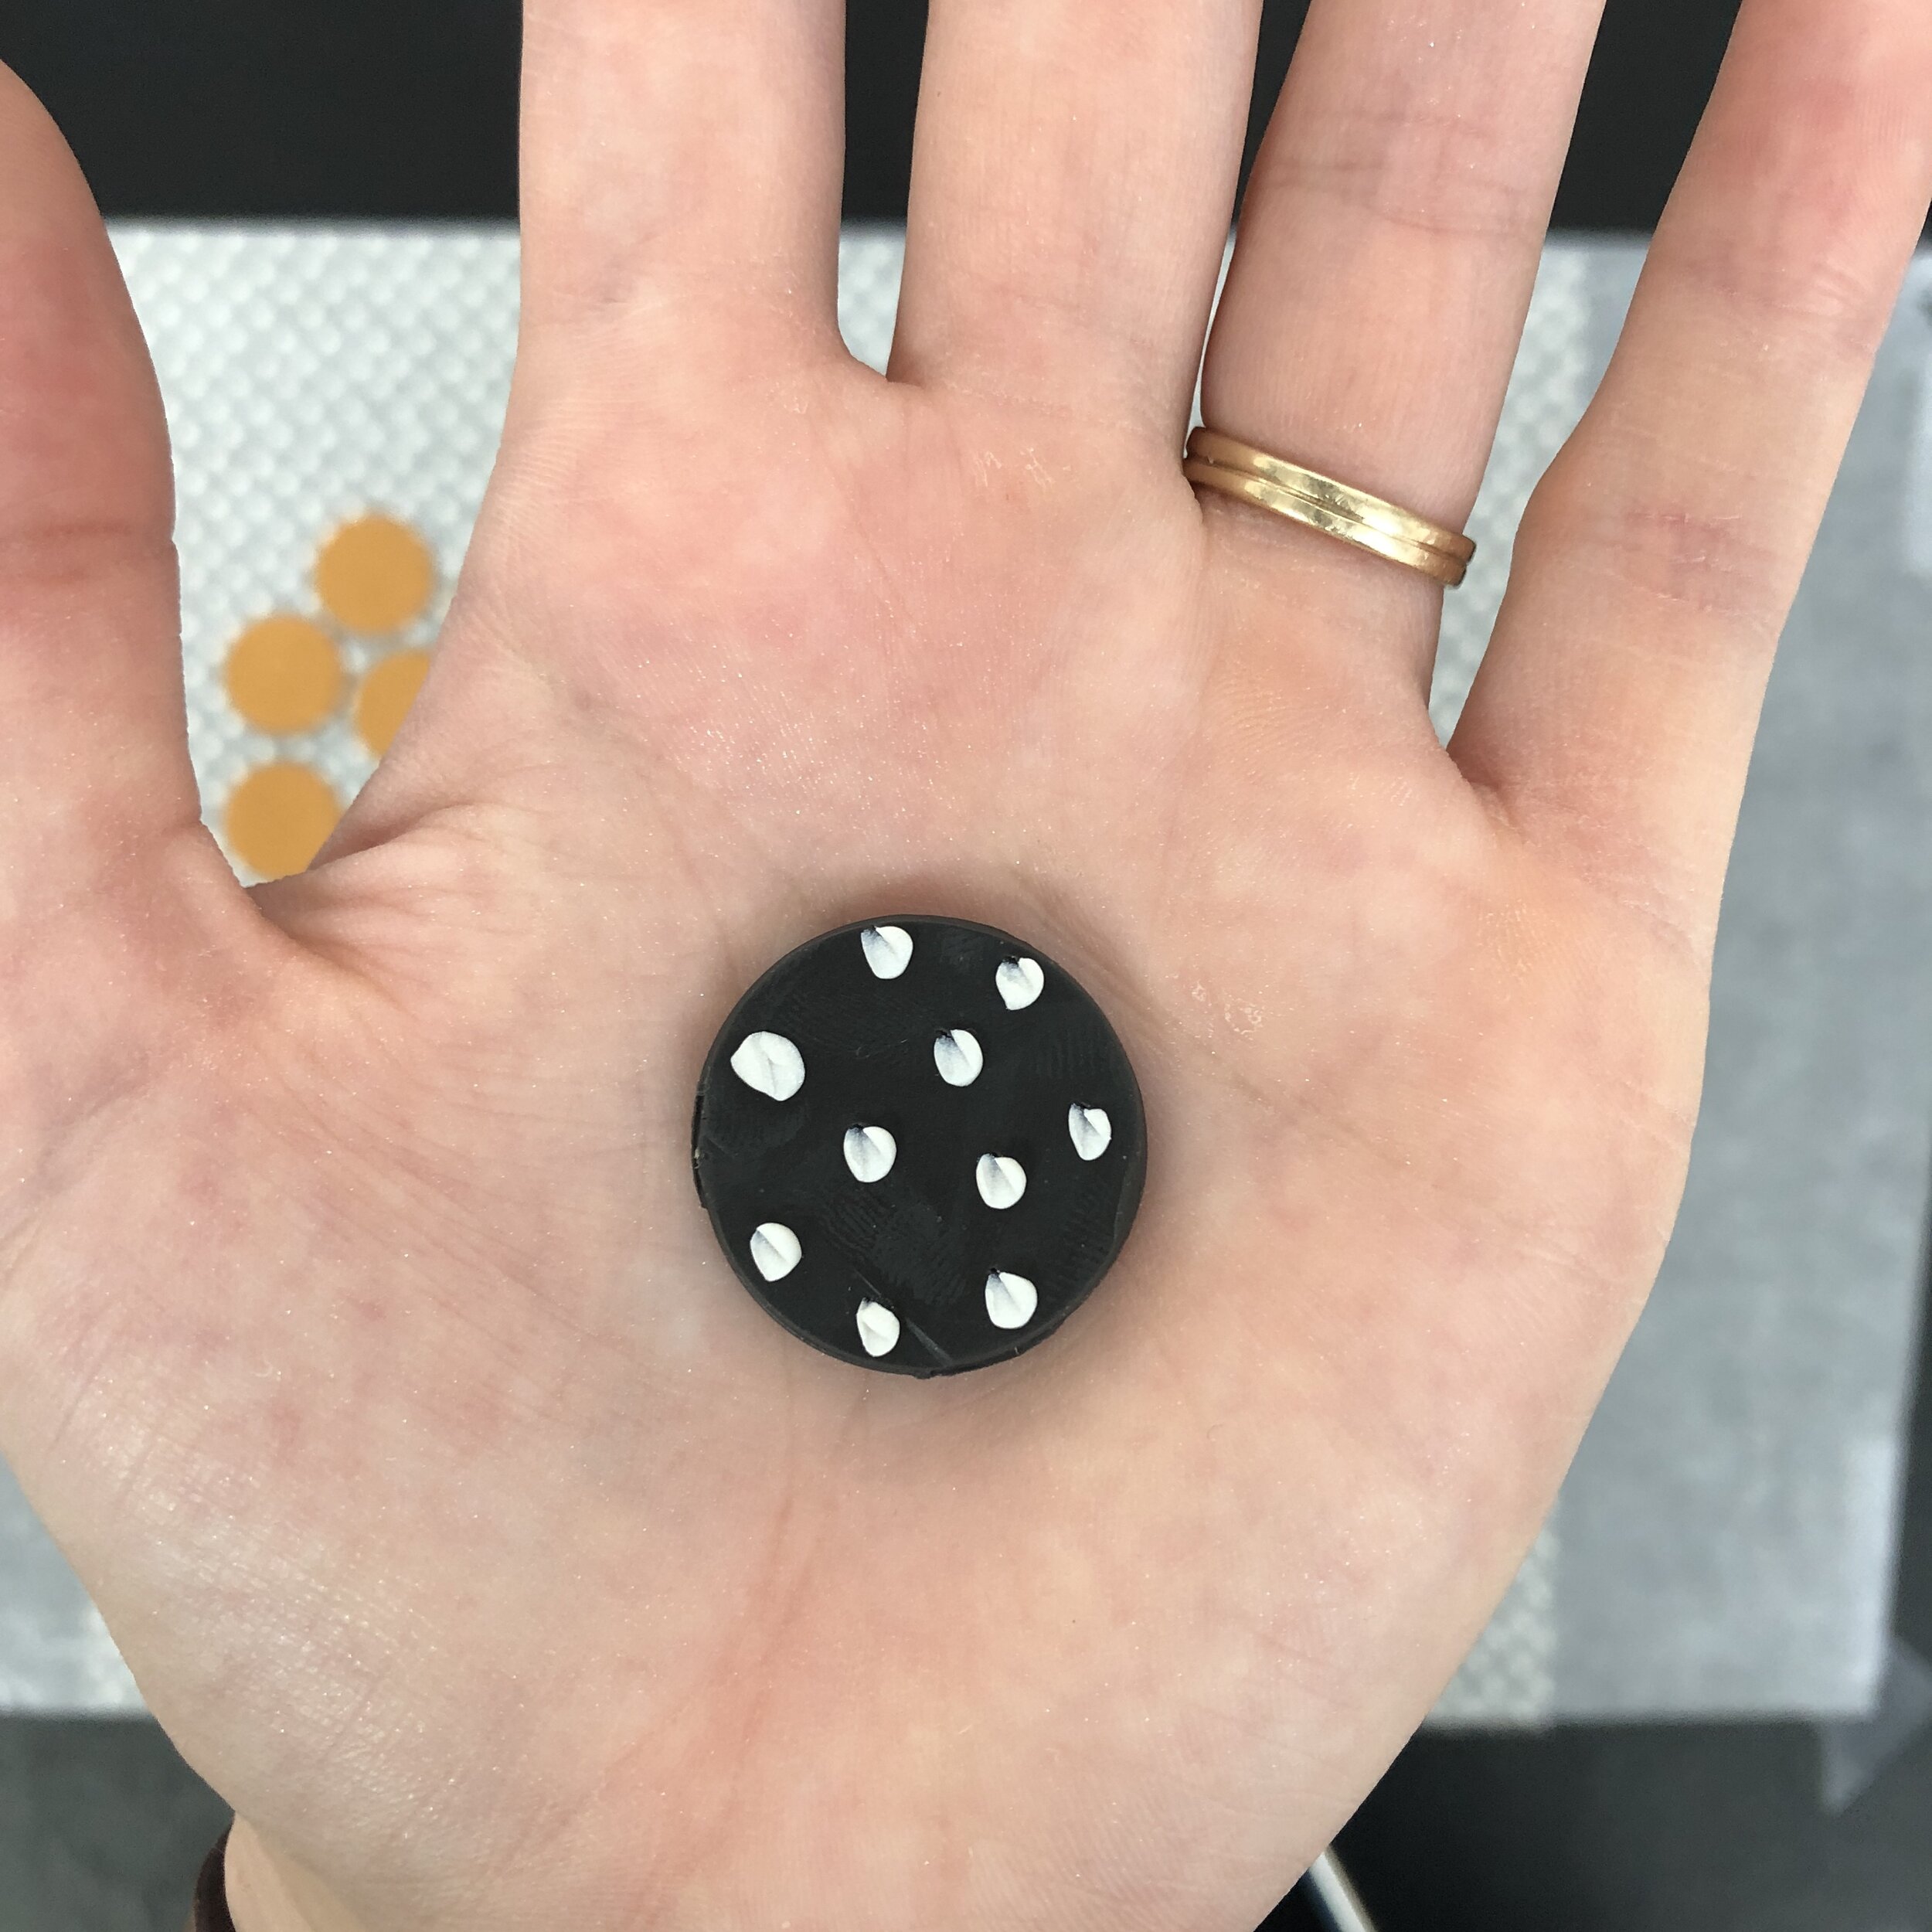
4. Take a small amount of a contrasting color of clay and roll it into a small cylinder, cut small circles out of the roll using an xacto knife, place the tiny circles on the big circle and roll flat using the roller or pen. Take another color and make more dots, place them so each new dot is touching a preexisting dot on the large circle.
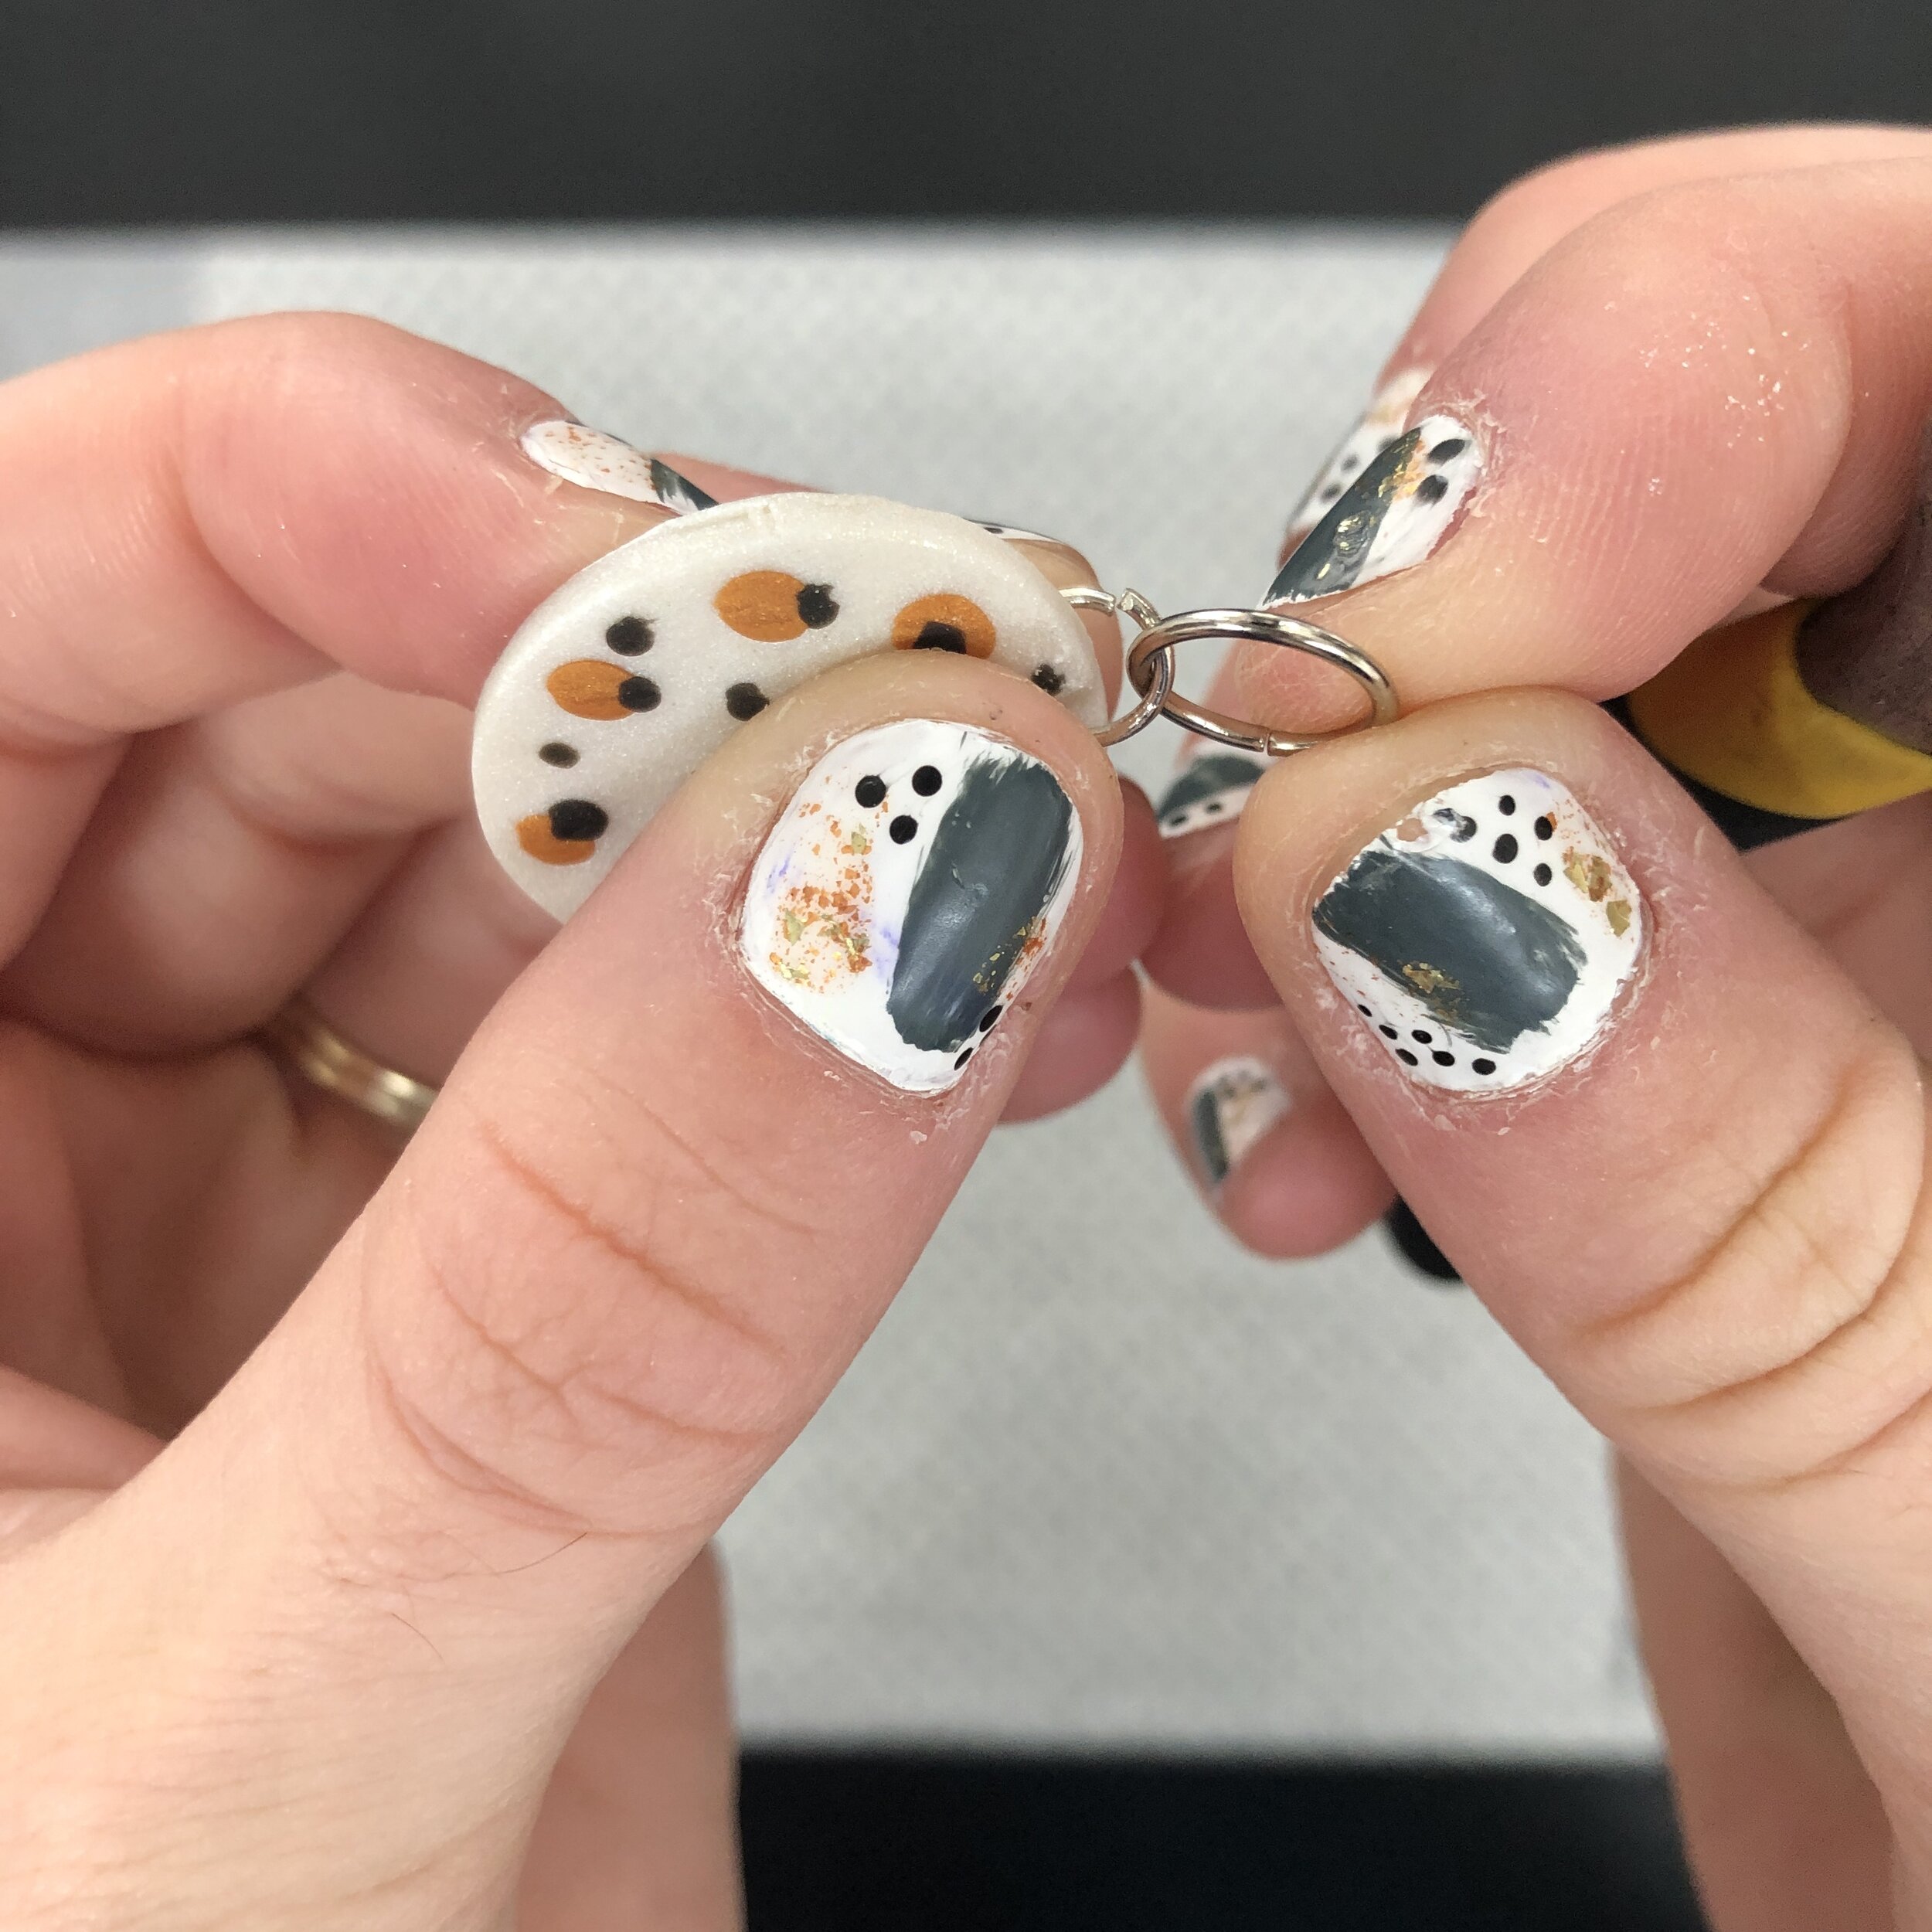
5. Place your circles on the bake tray. If you don’t have a small drill, make a small hole using a tooth pick, make sure to insert the tooth pick through the other side of the hole to make sure it is a clean hole for your jump ring in step 8.

6. Bake in the oven for 30 minutes at 230 degrees (F.) or follow whatever the package says.
7. Let your clay cool
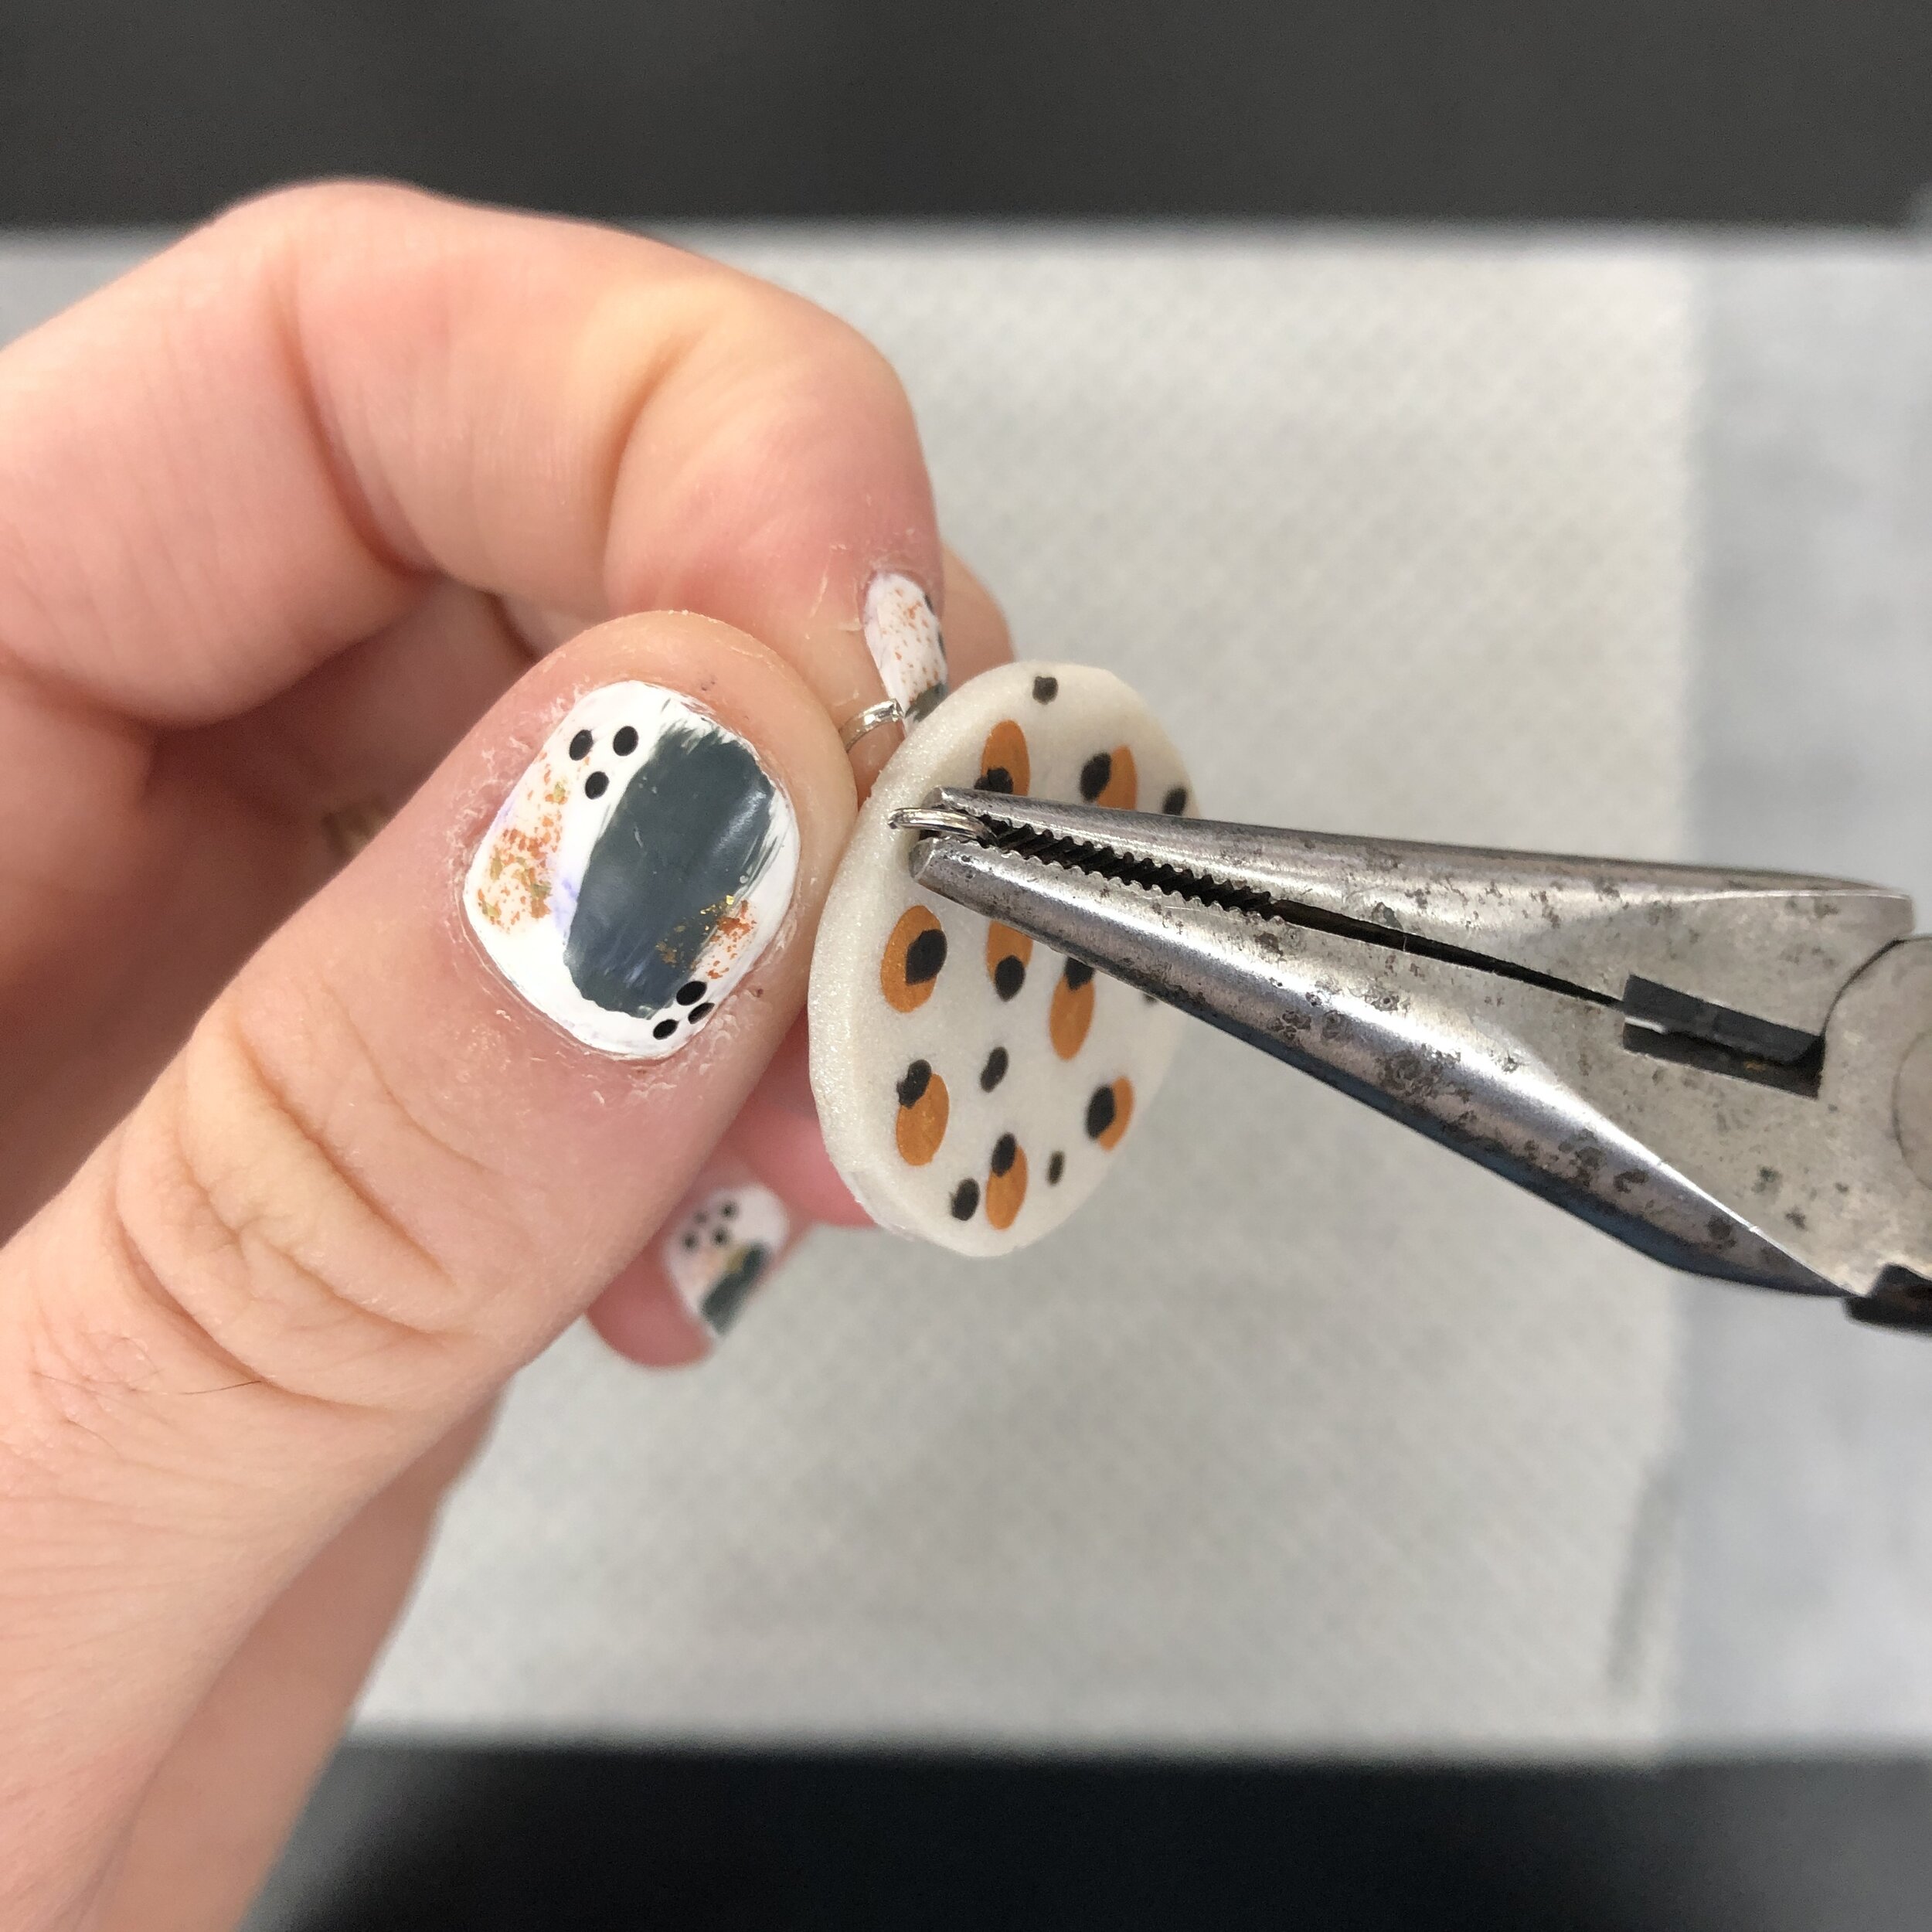
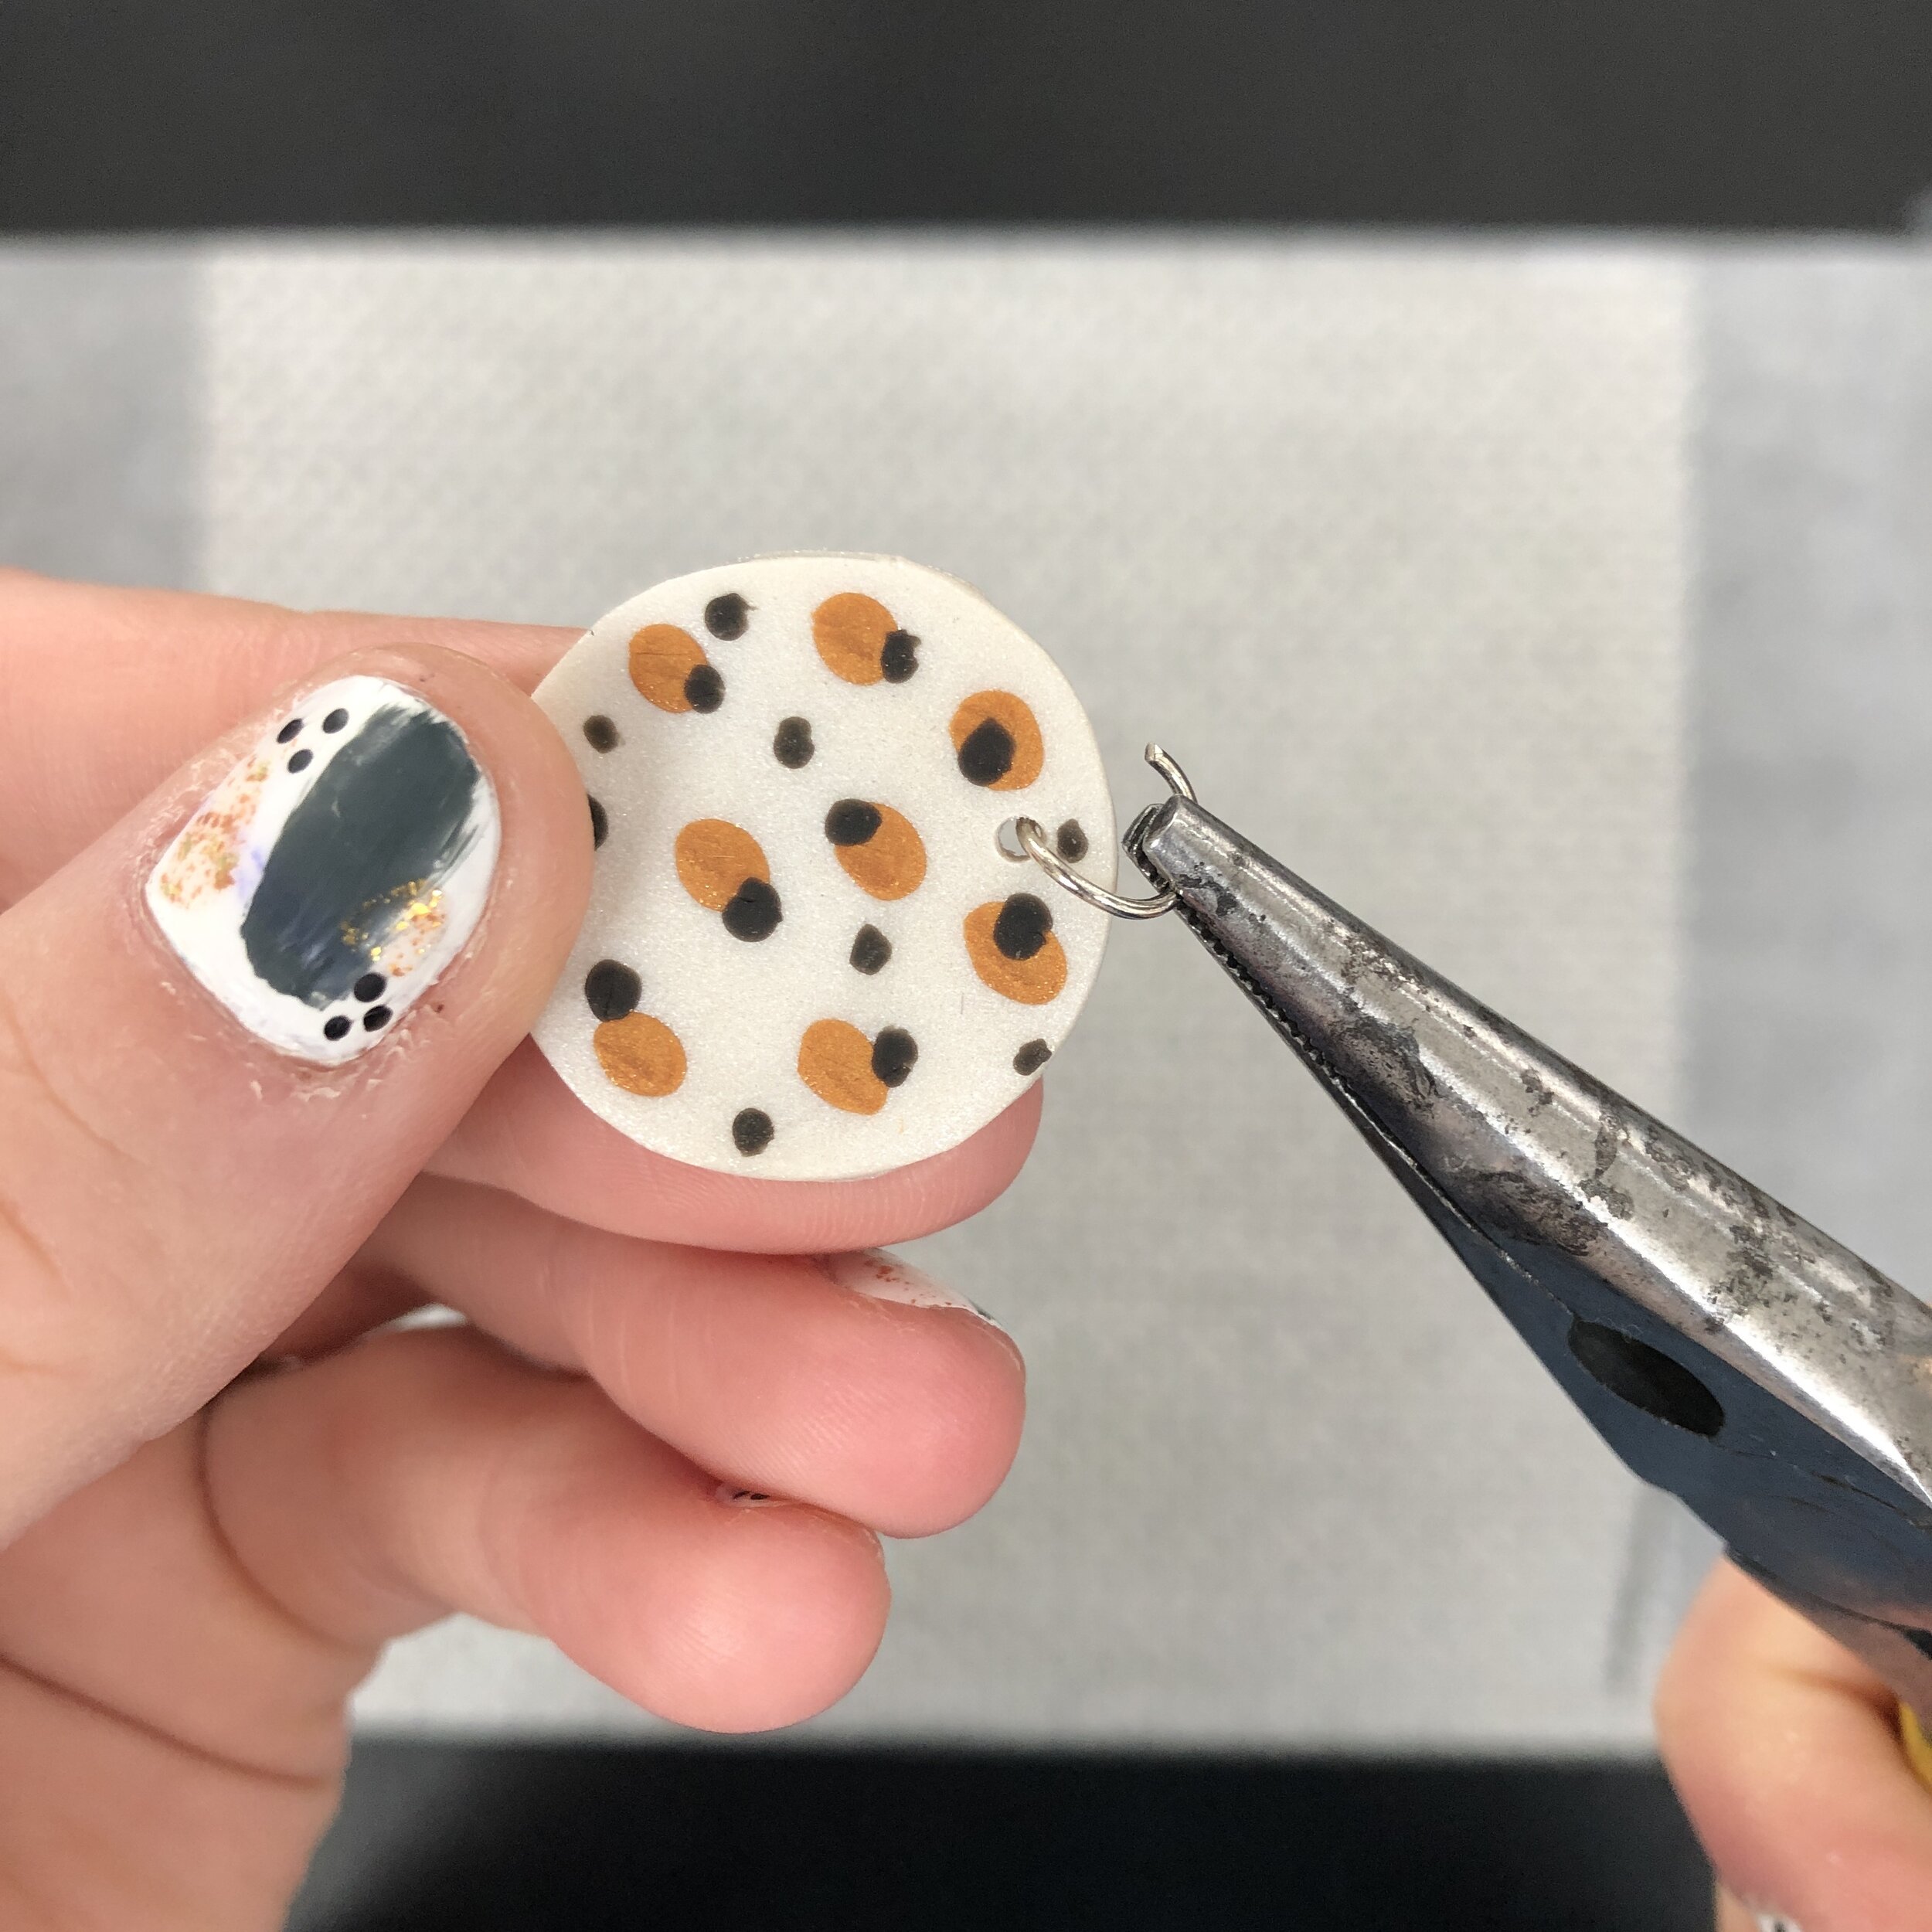
8. Drill a small hole in the stitch marker, NOT TOO CLOSE to the edge or it’ll break during use! (Been there, done that!)

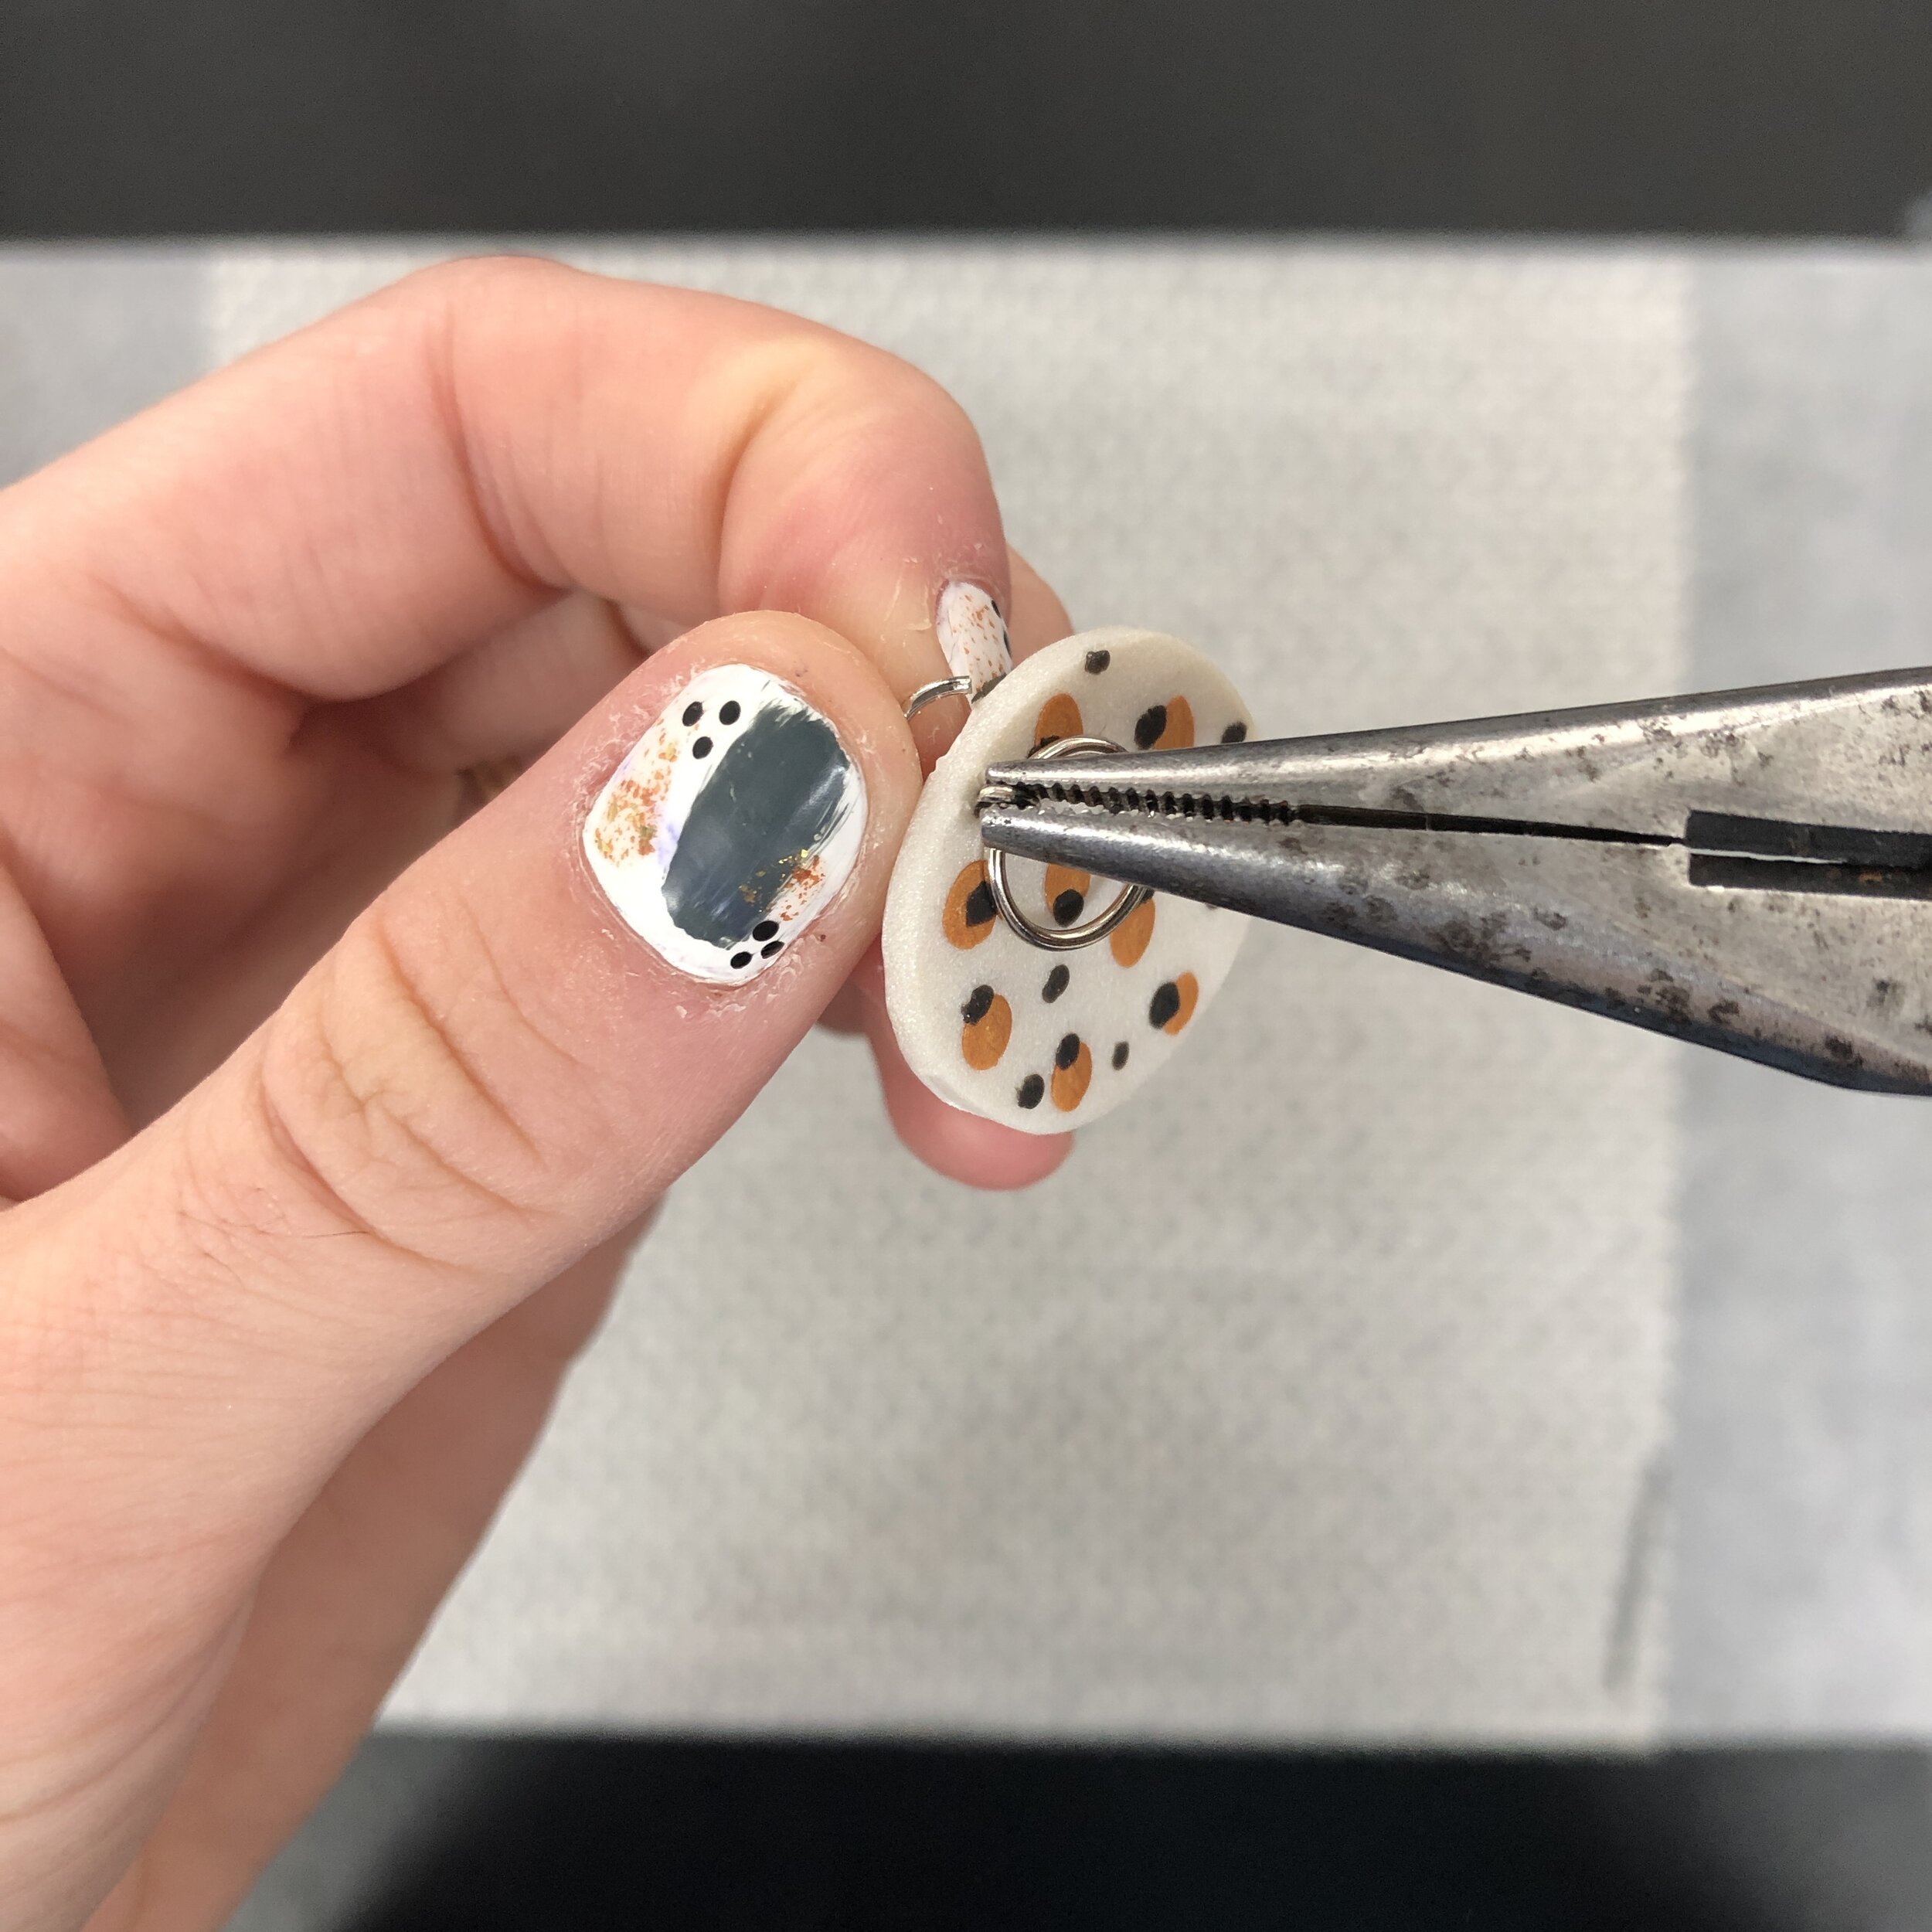
9. Open up your small jump ring using your needle nose pliers, insert through the hole in the circle, place the larger jump ring on the small jump ring, then close the small jump ring using the needle nose pliers. ENJOY

Half Moon Stitch Markers
Tape your wax paper to a flat surface.
Roll your clay out nice and flat using a roller or pen, make sure it’s not too thin or it’ll break during use.
Cut out your stitch marker circles using your circle cutter.
Cut the circle in half, if you don’t have a small drill, make a small hole using a tooth pick, make sure to insert the tooth pick through the other side of the hole to make sure it is a clean hole for your jump ring in step 9.
Place your half circles on the bake tray.
Bake in the oven for 30 minutes at 230 degrees (F.) or follow whatever the package says.
Let your clay cool
Drill a small hole in the stitch marker, NOT TOO CLOSE to the edge or it’ll break during use! (Been there, done that!)
Open up your small jump ring using your needle nose pliers, insert through the hole in the circle, place the larger jump ring on the small jump ring, then close the small jump ring using the needle nose pliers. ENJOY!